
An old PC has just been replaced by a newer one, and/or you’ve logged into a PC that you’ve never used before using your CCSU credentials. Now you need to print something and…there’s that useless Fax printer again! Where’s 1347?
The easiest way I stumbled across to add a printer is to open a web browser and hit <Ctrl P> or File | Print. This opens the print dialog box and presents the page to print as a pdf:
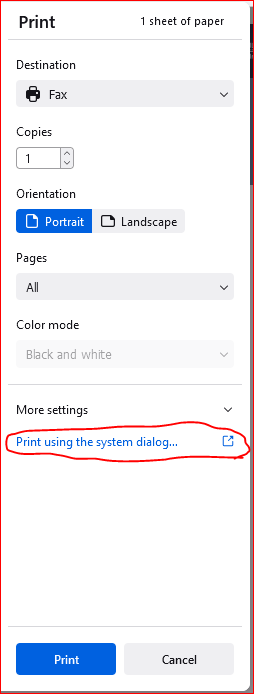
Click on the “Print using the system dialog…
As of May 2022, this gives you access to the selection tool which allows you to search and sort printers, unlike the clunkier Windows 10 UI that forces you to scroll through every blessed printer on campus.
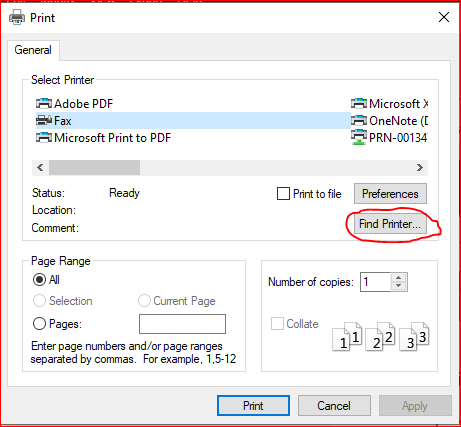
When the dialog box opens up, click Find Printer…:
You’ll get the full list of printers on campus, except you can search and sort:
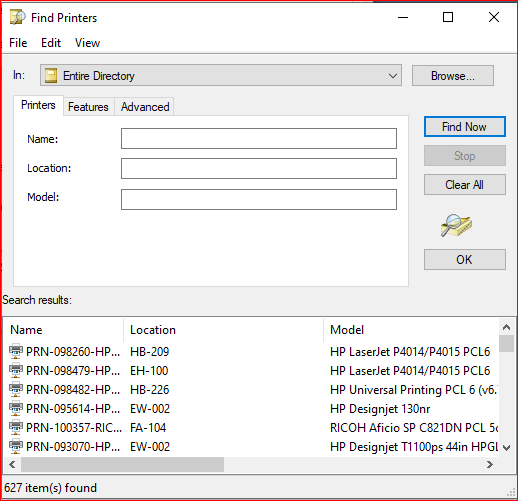
You’re probably looking for printers in EB, so you can enter. You could also sort by location and then scroll down to EB:

You can then scroll through the list, but if you’re at the Circ Desk, you can already see the printer you’re most likely to need, 1458. If that’s not the printer you need, scroll down the list until you find the one you’re looking for:
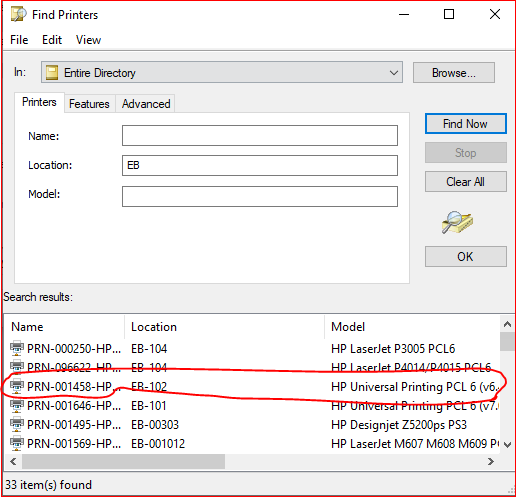
Assuming you want to add 1458, go ahead and click on 1458 and then click OK.
Two other notes:
1. There are other ways to find and add printers, this is only one of the easier ways
2. This is a per-account, per-PC setting. That means every account on this PC that needs the printer (remember student worker accounts) will need to log in on this PC to add this printer. Also, even though you add the printer to one PC you work one using your own CCSU Blue Net credentials, if you work on other PCs, you’ll need to add this there as well. I guarantee you’ll remember this the first time you try to print something.